
Rock Candy Fun: A Sweet STEM Activity for Kids
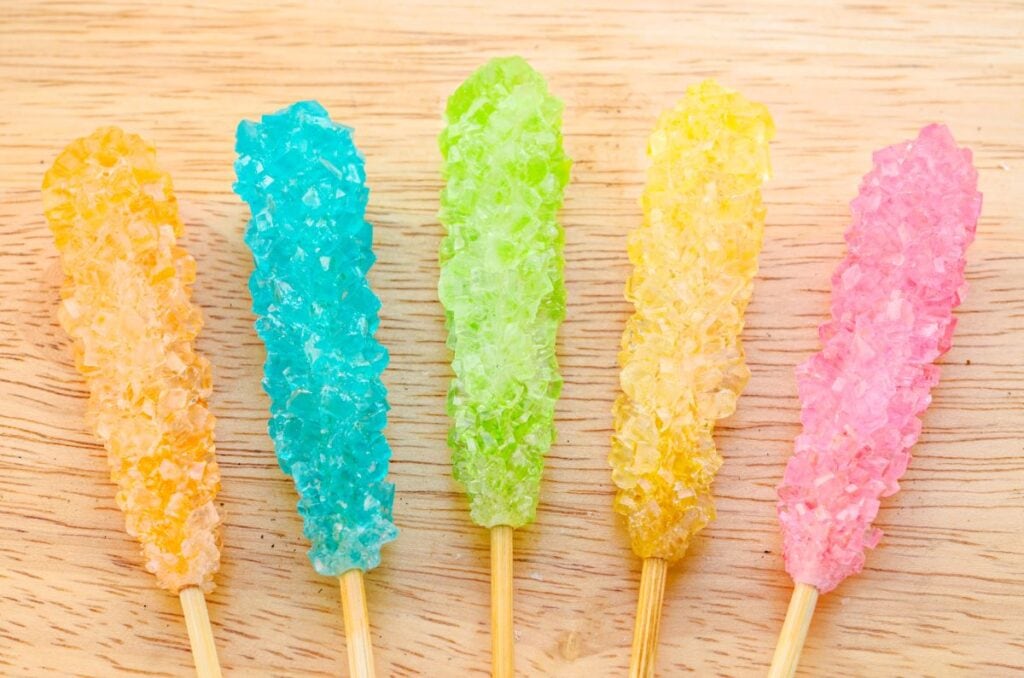
Looking for an easy science experiment that feels more like magic than learning? This homemade rock candy experiment is one of our favorite STEM activities for kids because it combines kitchen science, patience, observation, and a delicious reward at the end.
I still remember making rock candy as a kid and being absolutely fascinated by watching tiny sugar crystals slowly transform into giant sparkling candy crystals. It felt like something out of a science lab and a candy store all at once. While it felt like it took YEARS for them to grow, it also taught me an important lesson that feels increasingly rare these days: not everything happens instantly.
If you’re searching for a fun chemistry experiment for kids, a homeschool science project, or an educational rainy day activity, learning how to make rock candy at home checks every box.
What is Rock Candy?
Rock candy is a crystal candy made from sugar and water. As the sugar solution cools, sugar molecules begin attaching to one another and form large crystals over time.
The science behind rock candy involves creating a supersaturated solution (ooo, fun vocab word alert!), which means the water is holding more dissolved sugar than it normally could at room temperature. As the mixture cools and the water slowly evaporates, the excess sugar leaves the solution and forms crystals on your skewer or string.
For kids, this process feels a little like magic. For parents and teachers, it’s an incredible opportunity to introduce chemistry concepts.
Materials You’ll Need
- 2 cups of granulated sugar
- 1 cup of water
- 1/2 teaspoon of food coloring (optional)
- 1/2 teaspoon of flavor extract (optional)
- Wooden skewers or strings
- Clothes pins or tape
- A clean glass jar or cup
- A saucepan
Instructions
1. Prepare the Skewers or Strings
If you’re using skewers, soak them in water for a few hours or overnight. Roll the damp skewers in sugar and allow them to dry completely. This step helps the sugar crystals adhere better. For strings, tie them to a pencil or stick and place the stick across the top of the jar, so the string hangs down into the jar.
2. Make the Sugar Solution
In a saucepan, bring the water to a boil. Gradually add the sugar, stirring continuously until it dissolves completely. This creates a supersaturated solution, meaning it holds more sugar than it normally could at room temperature. (Great bonus science conversation right there!)
3. Add Color and Flavor
Once the sugar is dissolved, you can add a few drops of food coloring and flavor extract if you want to make your candy more exciting. Stir well to mix.
4. Cool the Solution
Allow the sugar solution to cool for a few minutes, then carefully pour it into your prepared jars or cups.
5. Grow the Crystals
Lower the skewer or string into the jar so it doesn’t touch the sides or bottom. Secure it in place using a clothespin or tape. Place the jar in a cool, undisturbed location. Crystals will start to form on the skewer or string over the next few days.
6. Observe and Enjoy
Watch as the crystals grow. It typically takes about 7 days for the crystals to form fully. Once they are ready, carefully remove them and let them dry.
Questions to ask include:
- Are the crystals getting larger?
- Are some areas growing faster than others?
- Does color affect crystal growth?
- Which flavor produced the largest crystals?
Keeping a science journal makes this activity even more educational.
Tips for the Best Rock Candy Crystals
- Start with very clean jars to avoid unwanted mystery crystal formation.
- Make sure your skewer doesn’t touch the sides of the jar.
- Avoid moving the jars once the crystals begin forming.
- Seed your skewers with sugar before placing them in the solution.
- Be patient — larger crystals need time to grow.
More Fun STEM Activities for Kids
If your kids loved making rock candy, here are a few more hands-on activities they may enjoy:
- Try our Color-Changing Baking Soda Volcano or Color Changing Noodles to explore chemical reactions.
- Make Glow Bowling for an exciting nighttime STEM challenge that combines engineering and active play.
- Create Ice Cream in a Bag for another lesson in food science fun
- Learn How to Press Flowers at Home to introduce children to preservation and plant science.
These activities make wonderful additions to homeschool lessons, summer learning, or rainy day fun.
Frequently Asked Questions About Making Rock Candy
Why didn’t my rock candy grow crystals?
The most common reason rock candy doesn’t grow is that the sugar solution wasn’t fully saturated. Be sure to dissolve all of the sugar completely while the water is hot. If the skewer touches the side or bottom of the jar, crystals may grow on the glass instead of the stick. Moving the jar too often can also disrupt crystal formation.
How long does it take for rock candy to grow?
Most rock candy crystals begin appearing within 24 to 48 hours, but larger crystals typically take between 5 and 7 days to fully develop. For extra-large crystals, you can continue growing them for up to two weeks.
Why do you soak the skewer before making rock candy?
Soaking the skewer and coating it with sugar creates “seed crystals” that give the dissolved sugar molecules a place to attach and begin growing. This often results in faster crystal formation and larger rock candy crystals.
Can you make rock candy without wooden skewers?
Yes! Cotton string works well as an alternative to wooden skewers. Simply tie the string to a pencil or craft stick and suspend it in the center of the jar so it doesn’t touch the sides or bottom.
Can I use brown sugar or other types of sugar?
Granulated white sugar produces the clearest and largest crystals, making it ideal for homemade rock candy. Brown sugar, powdered sugar, and sugar substitutes typically do not create the same crystal structure and may not work as well for this experiment.
What flavors work best for homemade rock candy?
Popular flavor choices include vanilla, peppermint, cotton candy, cherry, raspberry, watermelon, and lemon extracts. Kids often enjoy creating colorful flavor combinations to make their own custom rock candy creations. Honestly, just the taste of pure sugar crystals in a go to for my kids as well.
Is rock candy a science experiment?
Absolutely! Rock candy is a crystal-growing science experiment that teaches about supersaturation, crystallization, evaporation, and the scientific method. It is a popular STEM activity for classrooms, homeschool lessons, and science fairs.
What age is this rock candy experiment best for?
With adult supervision for the hot sugar syrup, children as young as preschool age can participate in observing crystal growth and recording changes. Elementary and middle school students can dive deeper into the chemistry concepts and even test variables as part of a science project.
Can you make rock candy in the winter?
Yes! Rock candy can be made year-round indoors. In fact, a quiet spot away from humidity and temperature fluctuations often helps crystals grow more consistently.
How do you store homemade rock candy?
Once completely dry, store rock candy in an airtight container at room temperature. Properly stored rock candy can last for several weeks or even months. At least I’ve heard… it never lasts that long in my house.
A Fun Home Experiment
Making rock candy at home is one of those rare activities that manages to be educational, memorable, inexpensive, and delicious all at once.
Kids get a front-row seat to chemistry in action while developing patience, observation skills, and curiosity about the world around them. Plus, who doesn’t love a science experiment that ends with a treat you can actually eat.
So grab your jars, prepare your sugar solution, and get ready to watch science become a little sweeter one crystal at a time.

Rock Candy at Home
Ingredients
- 2 cups granulated sugar
- 1 cup water
- 1/2 tsp food coloring a few drops
- 1/2 tsp flavor extract optional
Instructions
- Soak skewers in water overnight if using. If using string, tie to a pencil or stick and hang across the top of a jar so that string hangs into the jar.
- In a saucepan, bring water to boil and add sugar. Continue stirring until it is fully dissolved.
- Add color and flavor.
- Allow the sugar to cool for a few minutes, then pour into prepared jar.
- Place the jar in an undisturbed location. Crystals will begin to form over the next few days.
- After about 7 days, remove the stick or string from the solution and allow the crystals to dry.
- Enjoy!


